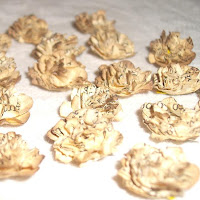
I finished the centres of the last flowers last night, deciding to make some mini-scrunchy-roses for the centres. I think these look a little like fancy dog roses...
I used the 'Flower W/Centres' sizzix die in my faithful little sidekick, and inked up five layers for each bloom - bottom two layers in 'Antique Linen', then two layers in 'Weathered Wood', and the top layer in 'Tattered Rose'. Then I scrunched 'em all up, followed by a careful unravelling of them all. Not really a good idea for people with rheumatoid arthritis *lol*
Next step was to twist each petal of every bloom very carefully (I use long-nosed tweezers), as the inking had made the petals slightly damp-ish, and then I set Razzer onto them... drying them all throroughly.
From here, it's just a matter of layering them up and then making the little scrunchy-roses for the centres. These were made by inking up old book paper (I used the Ranger Distress Ink again in 'Antique Linen'), and punching out 1.5cm flower shapes. Layering up five flowers to make one rose, and scrunching up each layer over a small brad used to hold the flowers in place, followed by a blast from Razzer - I tend to use the heat gun on these little blighters until I can smell burning - I like this tatty aged look it can give.
Wait for the roses to cool, and then loosen them a little with your fingertips (or any tool you like to use). Last job with these mini-menaces *lol* is to just ink up the edges to match the colour scheme you'll be using them with. I chose 'Weathered Wood' for the centres of my dog roses.
I really liked the soft colours on these, and am looking forward to creating a layout for them to appear on soon :)


2 comments:
I love the thought of you "roasting your roses" lol. And I'm certainly looking forward to seeing them appear on a layout soon.
These look so pretty.
Toni :o)
Post a Comment